Jumat

XAMPP | Free Development software downloads at SourceForge.net


XAMPP is a very easy to install Apache Distribution for Linux,
Solaris, Windows and Mac OS X. The package includes the Apache web
server, MySQL, PHP, Perl, a FTP server and phpMyAdmin. >>XAMPP Web Site <<


 Features

Apache

MySQL

PHP

Perl

and many more...


Additional Details

Last Updated 2013-08-29

Registered 2002-09-04

Maintainers bitnami , koswalds , kvogelgesang

License GNU General Public License version 2.0 (GPLv2)

Categories Database Engines/Servers, Dynamic Content, HTTP Servers, Site Management

User Interface Non-interactive (Daemon), Web-based, Win32 (MS Windows)

Languages English, German

Intended Audience Developers, Education, Information Technology, System Administrators

Programming Language PHP, Perl


Files


Name Modified Size Downloads Status
Totals: 9 Items


XAMPP Windows
2013-07-18

 51,325,221 downloads


XAMPP Mac OS X
2013-07-18

 1,830,480 downloads


XAMPP Linux
2013-07-18

 5,156,788 downloads


BETAS
2013-06-11

 1,282,033 downloads


XAMPP Solaris
2011-09-20

 91,751 downloads


Windows add-ons
2009-08-10

 1,652,038 downloads


Linux add-ons
2003-08-08

 24,683 downloads


LAMPP
2003-07-11

 78,753 downloads


WAMPP
2003-06-06
 78,753 downloads


JS Quicktags : alexking.org


JS Quicktags


I’ve released the JavaScript Quicktags used in Tasks Pro™, Tasks and WordPress under the LGPL license.

This is a set of buttons that allow you to insert HTML tags into a content area. The tags are cursor aware – placed around a selection or at the cursor position. This is also an example of how to get the cursor position with JavaScript.


Example Page


A sample insertAtCursor function:


function insertAtCursor(myField, myValue) {
//IE support
if (document.selection) {
myField.focus();
sel = document.selection.createRange();
sel.text = myValue;
}
//MOZILLA/NETSCAPE support
else if (myField.selectionStart || myField.selectionStart == '0') {
var startPos = myField.selectionStart;
var endPos = myField.selectionEnd;
myField.value = myField.value.substring(0, startPos)
+ myValue
+ myField.value.substring(endPos, myField.value.length);
} else {
myField.value += myValue;
}
}

// calling the function

insertAtCursor(document.formName.fieldName, 'this value');


JS Quicktags : alexking.org: JS Quicktags


Online HTML Editor Simple


Online HTML Editor: Real time online with preview


Credits


Thanks to Alex King for making JS Quicktags and releasing it under LGPL and thanks to Jesse Ruderman for having made the javascript for live edits.


Jim Westergren made this web site, primary for use with Clesto.com.


Online HTML Editor

Here you can write and see HTML in action.

Start your own web site in 5 minutes at www.n.nu.


Kamis

CARA MUDAH BANGKITKAN KHODAM DALAM DIRI KITA

Ini adalah cara yang praktis untuk membangkitkan khodam dalam diri kita, kalo sudah berhasil bisa berguna untuk kehidupan kita sesama umat manusia.

Caranya : Silahkan 
  • Puasa 1 hari dihari kamis tapi pada waktu bukanya jangan makan yg bernyawa seperti Ikan, Daging dan telor Dll.
  • Niat puasanya : Nawaitu shoma ghodin liqodoi hajati sunatan lillahi ta’ala
  • setelah puasa pada malam jumatnya jam 12 malemnya mandi besar, trus 
  • pake wangi-wangian yg non alkohol. 
  • Menyepi disebuah ruanagn yang sunyi dan tidak ada orang lain serta suara gaduh disana.
Dalam Kamar tersebut kerjakan sholat hajat 2 rakaat, selesai solat duduk bersila, Hadiahkan Surat Alfatihah ke nabi muhammad SAW, 4 malaikat, 4 sahabat nabi, & syeh abdul qodir al jaelani.

Selanjutnya Baca :
ASSALAMMUALAIKUM YA KHODAMUL MINAL BADANI 21X
( hadir – hadir – hadir ) sambil memukul lantai.
Baca : Yaa bathin 1000x (dibaca pelan dan dalam hati aja)
Kalo memang berhasil ditubuh kita ada khodamnya nanti dia akan datang, kalo sudah datang kita ucapin salam. Terus komunikasi, jangan lupa tanyain cara pemanggilan cepat.

kalo misalkan tidak muncul juga baca :
SYAMHAHIRIN SYAMKHOHIRIN 1000X
kalo sudah datang jangan lupa salam sama tanya cara pemanggilan cepat.

Ini harus dilakukan ditempat yg gelap jadi kamar kita tidk boleh ada cahaya yg masuk.
oya sebelum sholat kita pager diri dulu bacain ayat kursi sambil tahan nafas “ditembakin” ke kiri, kanan, depan, belakang, jadi lo 4x baca ayat kursinya, masing-masing arah 1x. Semoga berguna @@@ 
Ki Syarkowi  syarkowi@gmail.com

AJIAN SENGGORO MACAN

Ini adalah ajian pelengkap berbagai ajian kesaktian yang dimiliki oleh kalangan pendekar. Ajian ini tidak akan dikeluarkan bila kita tidak terdesak dan tidak dalam kondisi sangat terpaksa.
Sebab bila ajian ini dikeluarkan, maka dengan sekali gertakan maka nyali lawan akan langsung ciut, bertekuk lutut tidak berdaya. Apapun yang kita perintahkan padanya akan menurut seperti kerbau yang sudah dicocok hidungnya.

Mantranya sebagai berikut:

ONO KEDHAWANG MIBER ING TAWANG AWANG AWANG, MACAN SEWU ING MRIPATKU, MACAN PUTIH ING DHADHAKU, GELAP NGAMPAR SUWARAKU, DURGO MENDHAK KOLO MENDHAK TEKO KEDHEP TEKO WEDI, TEKO ASIH MUNGSUHKU, KODHENG MADHEP MANUT SAKAREPKU, SOKO KERSANING ALLAH.

Syarat Laku:
Untuk memiliki ajian ini, syaratnya adalah 
-Puasa mutih 3 hari 3 malam dan 
-Patigeni semalam. 
-Puasa dimulai pada hari Jum’at Pahing. 
Untuk matek aji caranya mudah: baca mantra tersebut diucapkan dalam hati. 

@wongalus,2009

Minggu

Add Facemoods Emoticons To Your Blogger Comments


Here are some amazingly funny emoticons compatible with your Blogger
comments - also with threaded commenting system! If you want to know how
to add them, just follow the next steps:


emoticons, smileys, blogger, tricks


Step 1.


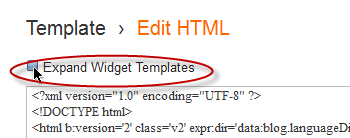
Go to Dashboard - Template - Edit HTML - Proceed


...and select Expand Widget Template (don't forget to make a backup)


Step 2. Search (using CTRL + F) for this code:


  • For previous commenting system: 


<h4 id='comment-post-message'><data:postCommentMsg/></h4>


  • For threaded comments:


<div class='post-footer-line post-footer-line-3'>


Step 3. Add the below code just above it


(for threaded comments, add the code after):


<b:if cond='data:blog.pageType == "item"'>

<div style=' width: 450px; text-align: left; border: 1px dashed
#0084ce; background: transparent; padding: 10px; color:#000000;
font-weight:bold; '>

<img border='0'
src='https://blogger.googleusercontent.com/img/b/R29vZ2xl/AVvXsEhkA0MwWddTTRdT0A5VJkAmIv9dTj0agaX_VWI4PBY3-lJanHTg1SqzDG-K51sAvoChOxv0RIm-QS8IuoiTdhA4-krrc2bswTKlun-Jfaws7wMWdYHeuA1h1izbK5X5VX2_9MyqT_qD4H04/s1600/helplogger.blogspot.com(1).gif'/>
:a

&#160;

<img border='0'
src='https://blogger.googleusercontent.com/img/b/R29vZ2xl/AVvXsEjxxDhizRNrVX_KpzHx7QXNa84at1woqNhh89yf8zNKPbd78rKqDyEW6Omk6fcgOXiuE8v0wDH7Lp6mU9BnCNW6X8dj1y8u3Ni_CcWDZ7-cZR-VudPQkwfX-MmssrbdOSOGae_d1fnpPCnW/s1600/helplogger.blogspot.com+(2).gif'/>
:b

&#160;

<img border='0'
src='https://blogger.googleusercontent.com/img/b/R29vZ2xl/AVvXsEiG3_TgIOtFjNQEbrcasVFQnUtQbq9VHa2jxViNIDSP8KrNQwNdPA7Y5HjoINvagj-_p7A-1js28btDwI6zGTOvM9nnvHxu7ml-xsDtFsrkmHB2CBALL_2p0oiKkofriJXhqji6cEm2EarT/s1600/helplogger.blogspot.com(3).gif'/>
:c

&#160;

<img border='0'
src='https://blogger.googleusercontent.com/img/b/R29vZ2xl/AVvXsEjbbxwx-iZiYtyXIOrdcX56RAPbgz4w9-Jwiky5GQyFRL9QFULYp7NAtbVPSzxN5UhUAazn3wYyeQvnM18af3ZjUGPpsyrtc7sBgXZCGG7aYAY846J_yLfX0RQa1hVnNw0LhGUBwIyZG2l5/s1600/helplogger.blogspot.com(4).gif'/>
:d

&#160;

<img border='0'
src='https://blogger.googleusercontent.com/img/b/R29vZ2xl/AVvXsEjXyVCnwnhZcgmLbCPfhs3hzPP4LdPaDiVu-lI54wBEY_-q_D-_eRZa9xIAOnuhW4D_eTPoYYjUM9jhn8U-hBq2FL5Fh4sAldR_uBmXlDeH4fUgvq5BCYCzzkRRDX3UOaFkVMnVks7VfNjw/s1600/helplogger.blogspot.com(5).gif'/>
:e

&#160;

<img border='0'
src='https://blogger.googleusercontent.com/img/b/R29vZ2xl/AVvXsEioEtVe2PsUtyFbw5gCfS6FyVcF-TA_Fn4FOfsrCuzAeLPZCj3uBiK8Kt8zImgH4lG-yfFjowLFepuekC7eyCq84rflymfZH51rtOPVdLwkuobHg4-C3MjVZO3EdNmmB7aOHMfNSvxIMXoN/s1600/helplogger.blogspot.com(6).gif'/>
:f

&#160;

<img border='0'
src='https://blogger.googleusercontent.com/img/b/R29vZ2xl/AVvXsEjeS9KJtoqsShlGboxe7teI_5GOSroI-G6dlt36r_hYFybSDUhyphenhyphendEFo633RGu-rny1rnEw4kZsILjGkhq0XmnTqQIiCD3CPvMqka_xa-mSHHK90J8pB2uJ6uMh6jpC7N3KKnKLQn31mn0So/s1600/helplogger.blogspot.com(7).gif'/>
:g

&#160;

<img border='0'
src='https://blogger.googleusercontent.com/img/b/R29vZ2xl/AVvXsEgiUSn5W_SUnjv5HQwkyHSHCYSkyonjE5Lx07p7r7-b3fDkkJ_ebgRdLqClajaPXr2vEz0gzGc7WEGS6Tlug_jl-uviLQzaRkYb71bUKGCKTt_-Hoyk6npQsHNNduTzMU7x1MzjYzXmY2fn/s1600/helplogger.blogspot.com(8).gif'/>
:h

&#160;

<img border='0'
src='https://blogger.googleusercontent.com/img/b/R29vZ2xl/AVvXsEjieaJcdn6u-46ppZow0MAcppfo8XNf9RFN0mD6fiYPwSbnazOXR0SXIzEv8R_zwr4nIMTghE210FuAZsig0MlAKwA9uZpdSb4sx2bGRCm7MJydTa9IqA4Z3Opu65b28z3zNfIaHHmWAzC8/s1600/helplogger.blogspot.com(9).gif'/>
:i

&#160;

<img border='0'
src='https://blogger.googleusercontent.com/img/b/R29vZ2xl/AVvXsEgRVuIDnxoBV6pyydhCV698oH76oLDcwzRWKUkoDsPrA9kUVzf1zdgy-hRmLOeNvDdkAUsQy0aDhcQ7yK0NZciqHXiKEoos5L8jRIKpJdg1O7tzdMiyplPUvJdEeV97NsJ36HhdPlHIwW5h/s1600/helplogger.blogspot.com(10).gif'/>
:j

&#160;

<img border='0'
src='https://blogger.googleusercontent.com/img/b/R29vZ2xl/AVvXsEj3kfSmp8v6ex9r7KUoF1QMj-ajqN5wlzJeUwHE27UqqjZDna47L73qYzBhxWhF6PMEScKOkX7Rm6eGa4d25qykuoTKGYoNsnNHFn365jnDjNHBrusKq8TaL8lT4sq1HjodEQu-LaVP0UIu/s1600/helplogger.blogspot.com(11).gif'/>
:k

&#160;

<img border='0'
src='https://blogger.googleusercontent.com/img/b/R29vZ2xl/AVvXsEhyQr2lOmQtixAcVNvQDlA8_AKdAU1pCao6Ad8Kv2ymk3Ms8TeVC34xWy0EyQ6iBWnVKsOfyvr1zZkR35tvTk04roc4bXf93mir3WSpzV616BqbLrr4k0tu3dsAdnZ7MFI5ccSYF0uizLbd/s1600/helplogger.blogspot.com(12).gif'/>
:l

&#160;

<img border='0'
src='https://blogger.googleusercontent.com/img/b/R29vZ2xl/AVvXsEj3nLfMxr7HV-ZU7tIrf0wV-VXKk7jLJwbhK1-3qeFm9YDXutm9j_uaIB_98t1ohXgIcdC1rSayRSgzhs61BSzTR72cODLYDYInTI4kOi92b6LhjcBhjk1c1E-1eCAP7ngQdiOZPj9pHXT1/s1600/helplogger.blogspot.com(13).gif'/>
:m

&#160;

<img border='0'
src='https://blogger.googleusercontent.com/img/b/R29vZ2xl/AVvXsEjyiFjZfo6ozejTJ6Fc4CaHiuImm6Nx-5COWPyhygmMeCEiwgVeouox8k3Q3pM5sq97X_CRhtMDJq8xkFVdC_A4rHNWKmHyIEz3sG9ti-yFBBB6zBW5p935vhzfLUInK4fZd9Ra12j8f5VE/s1600/helplogger.blogspot.com(15).gif'/>
:n

&#160;

<img border='0'
src='https://blogger.googleusercontent.com/img/b/R29vZ2xl/AVvXsEifcN6xUU-V_zYxaVn0SSowvQokr7HDFcSHMSskl3xLhT_mn6GbgeiCbAGbmMNh48qXf0Tt4olVFvaPf_QQAdTcXaunpSkgyuZ3bxrZ5hPqjBDasWbMDhPliNZhWz96RnE6g_dm4KfRp3hb/s1600/helplogger.blogspot.com(16).gif'/>
:o

&#160;

<img border='0'
src='https://blogger.googleusercontent.com/img/b/R29vZ2xl/AVvXsEgspnGUc_3i7yJEGbe8pTGxl4PbXI3FSV8TxB4ERiabQXj9ADqk1qRP7E2o8ajEohyFpBFoOX0FlNQomME_G_eXLicO_ENYZn4JijUp08M9C5zC1Evw8VDOI26vY6vhjo_oJnzKX9y59aTH/s1600/helplogger.blogspot.com(14).gif'/>
:p

&#160;

<img border='0'
src='https://blogger.googleusercontent.com/img/b/R29vZ2xl/AVvXsEj6hIQiCdL-SmBNZYzjQJC_D3eWDCQJQ2S-ugAx8nCDXOW-Geh-ytuanHEktOrdKJdXyqsnxWW8Q4pBmKfeAxes-iFmp3Fq3wJPDrU_OD6bSD_ZFIU6W8_oD59sL1Ju98y3fUrr79dxo1tH/s1600/helplogger.blogspot.com(17).gif'/>
:q

&#160;

<img border='0'
src='https://blogger.googleusercontent.com/img/b/R29vZ2xl/AVvXsEglTmBJhOS_-bkLmWALvxyie5lfKf0_-tzdkYZMctA9JMVPtSJ8NMyqmMp-EDGGqwbAHBPid2DpZodBaqZkZJ2wjf_6WvUn7uXadRNQwNCGlyRSjz6vvEsxPUQCJEdM7WTr4wGLQqIZ5uAc/s1600/helplogger.blogspot.com(18).gif'/>
:r

&#160;

<img border='0'
src='https://blogger.googleusercontent.com/img/b/R29vZ2xl/AVvXsEjH6n0se-cxP9CEUBCESdstUf3_g0y9fyHFV18z0A4mHme5Bez8C6YS_KFgjE3qgu5fDDPT6D-8VPme8k4n1BzU4SToDb9c-3fO5jyVqcAAkssyFbKV2h_pDmXU2Hixk8G_sw8HJkhhYbXI/s1600/helplogger.blogspot.com(19).gif'/>
:s

&#160;

<img border='0'
src='https://blogger.googleusercontent.com/img/b/R29vZ2xl/AVvXsEicmHxVL9G3hCtSIgQBeo7EQ2rJ70ygGj930AEz5SiRmyGVOgNiC-Dno7GGZ0Jv8bjv4FG-RquJFzX_c8MPcF5-jcGjVKs5jz-FsugRX8W6heNhufUBtLQ0VhfNHYbPLykmnTDoSOiCfTGJ/s1600/helplogger.blogspot.com(20).gif'/>
:t   <a
href='http://helplogger.blogspot.com/2012/05/add-facemoods-emoticons-to-your-blogger.html'
style='color: rgb(30, 122, 183); font-size: x-small;'>Add smileys to
Blogger + </a>

</div></b:if>


Step 4. Now search for this piece of code:


</body>


Step 5. And add the following code immediately above it:


  • For previous commenting system:


<script type='text/javascript' src="http://helplogger.googlecode.com/svn/trunk/facemood emoticons.js"/>


  • For threaded comments: 


<script type='text/javascript' src="http://helplogger.googlecode.com/svn/trunk/facemood emoticons threaded.js"/>


Step 6. Save the Template. Now, enjoy your comments!


Recent Posts Widget with Thumbnails for Blogger/Blogspot


A few days ago, I've posted a tutorial about How To Add A Simple Recent Posts Widget
but today I want to present to you a very nice Recent Posts widget that
comes along with posts thumbnails and post summary as well. If you want
to know how to add this Recent Posts widget/gadget to your Blogger
blog, then follow the steps below:


recent posts, blogger widgets


How to Add the Recent Posts Widget to Blogger


Step 1. Go To Blogger > Layout and click on "Add a Gadget" link


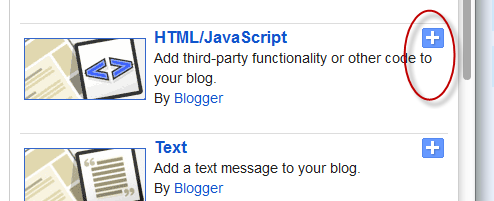
Step 2. From the pop-up window, scroll down and choose HTML/JavaScript


Step 3. Paste inside the empty box, the following code:


<div class="eggTray">

<script
src="http://helplogger.googlecode.com/svn/trunk/listbadge.js">{"pipe_id":"1a6640e2a78b2c6e736f2220529daae5","_btype":"list",

"pipe_params":{"URL":"YOUR-BLOG/SITE-URL/feeds/posts/default"},

"hideHeader":"false","height":"500","count": 8 }</script>

<div style="font-family: arial, sans-serif; font-size: 9px;"
class="ycdr"><a
href="http://helplogger.blogspot.com/2012/05/recent-posts-widget-with-thumbnails-for.html"
target="_blank" title="Grab this widget">Recent Posts
Thumbnails</a> <a href="http://helplogger.blogspot.com/"
target="_blank">Blogger
Widget</a></div><noscript>Your browser does not
support JavaScript!</noscript></div>

<style type=text/css>

.eggTray {margin:10px 0px;padding:0px;}

.ybr li  {border-bottom:0px #cccccc dotted; padding:0px 0px 10px 0px!important;}

.pipesTitle {padding-top:0px;}

.pipesDescription {display:true;}

.ycdr {background:transparent
url(https://blogger.googleusercontent.com/img/b/R29vZ2xl/AVvXsEiMawMI2YoOJVrEbo_5RhChGOg5je9ecE-XebMLdotRkff_ehLPeZzwBVDKfnah9fngHhiIkbjFT_W_m1IbRexcQhyphenhyphen3zxe0fKDfvcvPN4REmQduQ8F6RPsKy6AYqzINjZi7ppZ9sx6RUWw/s1600/logo.png)
0px 0px no-repeat; padding: 1px 0px 0px 19px; height:14px; margin: 4px
0px 0px 0px;line-height:14px;}

.ycdr, .ycdr a {color:#999999;}

.widget .popular-posts ul {padding-left:0;}

</style>


Step 4. Change YOUR-BLOG/SITE-URL with the url address of your site/blog (ex: http://helplogger.blogspot.com) and look to have no forward slash symbol "/" at the end of your url


Note:


  • To disable the scroll bar, remove the number 500

  • By default, this widget is set to display a maximum of 8 recent posts. To change this number, replace the number 8 with the number of posts desired

  • if you want only the posts titles to appear, change true to none and "0" from padding-top:0px with 10


Step 5. Save your widget. And you're done!


If you need more help, leave your comment below.


add go to top and go to bottom buttons Using jQuery in Blogger


/*
The Up and Down buttons can be used to navigate to the top and bottom
of the page content, especially when on the main page there are many
articles or when an article has too many comments. These buttons have a
fadeIn and fadeOut effect, this means that they will fade slightly when
we are scrolling to the top or bottom of the page and additionally, have
the function of going up/down the blog.


blogger widgets, blogger navigation


Demo


You can see a live demo on my blog, the buttons are located on the right side.


How to put Go Up and Go Down buttons using the jQuery slide effect


Step 1. Go to Template, click on the Edit HTML button


Step 2. Select the "Expand Widget Templates" box


Step 3. Search (using CTRL + F) for the following piece of code:


]]></b:skin>


Step 4. Just above this code, paste this one:


/* Up and Down Buttons with jQuery

----------------------------------------------- */

.button_up{

padding:7px; /* Distance between the border and the icon */

background-color:white;

border:1px solid #CCC; /* Border Color */

position:fixed;

background: white url(https://blogger.googleusercontent.com/img/b/R29vZ2xl/AVvXsEjUdelsPJ5E4HdlQd4gr-ZLwIikDFNJga8uel0exKaBYyIpof9RY4hiPLCHFE2ATK23CFK_H7NDVlE7lzgWjA5sbyKaTu-P025GBefZqVZrp2LoP-tvGx37ou6NHNjkJayi_69JxrE_drE/s16/arrow_up.png) no-repeat top left;

background-position:50% 50%;

width:20px; /* Button's width */

height:20px; /* Button's height */

bottom:280px; /* Distance from the bottom */

right:5px; /* Change right to left if you want the buttons on the left */

white-space:nowrap;

cursor: pointer;

border-radius: 3px 3px 3px 3px;

opacity:0.7;

filter:progid:DXImageTransform.Microsoft.Alpha(opacity=70);

}

.button_down{

padding:7px; /* Distance between the border and the icon */

background-color:white;

border:1px solid #CCC; /* Border Color */

position:fixed;

background: white url(https://blogger.googleusercontent.com/img/b/R29vZ2xl/AVvXsEgAZwTfp2whlkvJ8Potpv9stHiT6hE9crgoWGZYVpeZYo9VbdAmcZufhMsufDivyPZrc7lRTQvCg_5XODmo2gIXy5WOY30DrP9gjngdBlEan1qvaQcW3x5TkughVhQKhpHTpr1CPIIZ58s/s16/arrow_down.png) no-repeat top left;

background-position:50% 50%;

width:20px; /* Button's width */

height:20px; /* Button's height */

bottom:242px; /* Distance from the bottom */

right:5px; /* Change right to left if you want the buttons on the left */

white-space:nowrap;

cursor: pointer;

border-radius: 3px 3px 3px 3px;

opacity:0.7;

filter:progid:DXImageTransform.Microsoft.Alpha(opacity=70);

}


Note:  - in green are some annotations that explains what styles you can modify on their left side.

           - You can change the arrows by changing the URLs in blue.

           - To change the buttons background color of buttons, change the white text with your color


Step 5. Now search (CTRL + F) for this tag:


</body>


Step 6. And just above it, paste the following code:


<script src='http://ajax.googleapis.com/ajax/libs/jquery/1.7.1/jquery.min.js' type='text/javascript'/>


<div class='button_up' id='button_up' style='display:none;'/>

<div class='button_down' id='button_down' style='display:none;'/>


<script>

//CDATA[

(function(){var special=jQuery.event.special,uid1='D'+(+new
Date()),uid2='D'+(+new
Date()+1);special.scrollstart={setup:function(){var
timer,handler=function(evt){var
_self=this,_args=arguments;if(timer){clearTimeout(timer)}else{evt.type='scrollstart';jQuery.event.handle.apply(_self,_args)}timer=setTimeout(function(){timer=null},special.scrollstop.latency)};jQuery(this).bind('scroll',handler).data(uid1,handler)},teardown:function(){jQuery(this).unbind('scroll',jQuery(this).data(uid1))}};special.scrollstop={latency:300,setup:function(){var
timer,handler=function(evt){var
_self=this,_args=arguments;if(timer){clearTimeout(timer)}timer=setTimeout(function(){timer=null;evt.type='scrollstop';jQuery.event.handle.apply(_self,_args)},special.scrollstop.latency)};jQuery(this).bind('scroll',handler).data(uid2,handler)},teardown:function(){jQuery(this).unbind('scroll',jQuery(this).data(uid2))}}})();


$(function() {

var $elem = $('body');

$('#button_up').fadeIn('slow');

$('#button_down').fadeIn('slow');

$(window).bind('scrollstart', function(){

$('#button_up,#button_down').stop().animate({'opacity':'0.2'});

});

$(window).bind('scrollstop', function(){

$('#button_up,#button_down').stop().animate({'opacity':'1'});

});

$('#button_down').click(

function (e) {

$('html, body').animate({scrollTop: $elem.height()}, 800);

} );

$('#button_up').click(

function (e) {

$('html, body').animate({scrollTop: '0px'}, 800);

} );});

//]]>

</script>


Note: In case you want to remove the "Go to top" button, remove
the 1st bolded code and to remove the "Go to bottom" button, remove the
2nd one.


Step 7. Finally, Save your Template. Enjoy!


Recent Comments Widget For Blogger


This is icon for social networking website. Th...
This is icon for social networking website. This is part of Open Icon Library's webpage icon package. (Photo credit: Wikipedia)

The Recent Comments Widget for Blogger displays the recent blog comments
on your blog's sidebar, showing a snippet of the last comments along
with the title of the post to which the comment was made. If you want to
encourage your readers in leaving comments on your blog, this is a
widget I would recommend.


How To Install The Recent Comments Widget For Blogger


Step 1. Go to your Blogger Dashboard >> Layout >> Add a Gadget


Step 2. From the pop-up window, scroll down and choose the HTML/JavaScript option:


Step 3. Now copy and paste the below code in the HTML/JavaScript box:


<script style=text/javascript
src="http://helplogger.googlecode.com/svn/trunk/recent comments
widget.js"></script><script style=text/javascript >var
a_rc=5;var m_rc=false;var n_rc=true;var
o_rc=100;</script><script src=http://your-blog-name.blogspot.com/feeds/comments/default?alt=json-in-script&callback=showrecentcomments
></script><span id=rcw-cr><a
href=http://helplogger.blogspot.com/2012/03/recent-comments-widget-for-blogger.html>Recent
Comments Widget</a></span><style type=text/css>
.rcw-comments a {text-transform: capitalize;} .rcw-comments
{border-bottom: 1px dotted; padding-top: 7px!important; padding-bottom:
7px!important;} #rcw-cr {font-family:
Arial,Tahoma;font-size:9px;padding-top:7px;display:block;}
</style>


Step 4. Replace your-blog-name with your blog url.


Step 5. Click Save and you're done.


Hope you'll enjoy it!


Sabtu

Membuat Widget Related Posts dengan Thumbnail pada Blogger


Cara menambahkan Widget Related Posts dengan Thumbnail pada Blogger

Sekarang di sini adalah cara yang mudah untuk menampilkan posting terkait di bawah setiap posting blog Anda, bersama dengan thumbnail. Artikel-artikel terkait dipilih dari pesan lainnya dalam kategori yang sama / label / tag. Dengan cara ini banyak pembaca Anda akan tetap di blog Anda untuk waktu yang cukup lama ketika mereka melihat posting terkait kepentingan.


related post, related posts blogger, blogger widgets


Langkah menambahkan Widget Related Posts ke Blogger / Blogspot


Langkah 1. Buka Blogger Dashboard >> Template >>Edit HTML;


Langkah 2. Centang pada "Expand widgets template" box;


Langkah 3. Cari (CTRL + F) kode <head> dibawah ini:


</head>


Langkah 4. Copy dan paste kode di bawah ini sebelum / di atas </head>


<!--Related Posts with thumbnails Scripts and Styles Start-->

<!-- remove --><b:if cond='data:blog.pageType == &quot;item&quot;'>

<style type='text/css'>

#related-posts {

float:center;

text-transform:none;

height:100%;

min-height:100%;

padding-top:5px;

padding-left:5px;

}


#related-posts h2{

font-size: 18px;

letter-spacing: 2px;

font-weight: bold;

text-transform: none;

color: #5D5D5D;

font-family: Arial Narrow;

margin-bottom: 0.75em;

margin-top: 0em;

padding-top: 0em;

}

#related-posts a{

border-right: 1px dotted #DDDDDD;

color:#5D5D5D;

}

#related-posts a:hover{

color:black;

background-color:#EDEDEF;

}

</style>

<script type='text/javascript'>

var defaultnoimage=&quot;https://blogger.googleusercontent.com/img/b/R29vZ2xl/AVvXsEj8Q4EGKs2KMqqTOf8ebDfs1ttdoalqEsqa7jmMxMMcUjnm_vsgYvZ9gDmDBzSjuclRFuvW_tmAHGuRHPHBl0jxcD2PlWor6ME2Zv0ceJC5GP5RfgWY-fh-8FOqWfCpOKht54qHaIIhWna2/s1600/no_image.jpg&quot;;

var maxresults=5;

var splittercolor=&quot;#DDDDDD&quot;;

var relatedpoststitle=&quot;Related Posts&quot;;

</script>

<script src='http://helplogger.googlecode.com/svn/trunk/related-posts-with-big-thumbnails.js' type='text/javascript'/>

<!-- remove --></b:if>

<!--Related Posts with thumbnails Scripts and Styles End-->


Note:

- to change the default picture, replace the URL in blue with your own

- for displaying more than 5 posts, replace 5 value from "var maxresults=5;"

- remove the code in violet if you want the related posts to be displayed in homepage too

Catatan:
- Untuk mengubah gambar default, ganti
URL yang berwarna biru dengan link gambar yang Anda miliki
- Untuk menampilkan lebih dari
5 posting, ganti 5 nilai dari  "var maxresults=5;"
- Hapus
kode yang berwarna violet/ungu jika Anda ingin menampilkan widget ini dalam homepage juga


Langkah 5. Sekarang cari kode berikut:


    <div class='post-footer'>


Langkah 6. Dan tepat di atasnya, copy dan paste kode di bawah ini:


<!-- Related Posts with Thumbnails Code Start-->

<!-- remove --><b:if cond='data:blog.pageType == &quot;item&quot;'>

<div id='related-posts'>

<b:loop values='data:post.labels' var='label'>

<b:if cond='data:label.isLast != &quot;true&quot;'>

</b:if>

<script expr:src='&quot;/feeds/posts/default/-/&quot; +
data:label.name +
&quot;?alt=json-in-script&amp;callback=related_results_labels_thumbs&amp;max-results=6&quot;' type='text/javascript'/></b:loop>

<script type='text/javascript'>

removeRelatedDuplicates_thumbs();

printRelatedLabels_thumbs(&quot;<data:post.url/>&quot;);

</script>

</div><div style='clear:both'/>

<!-- remove --></b:if>

<b:if cond='data:blog.url == data:blog.homepageUrl'><b:if cond='data:post.isFirstPost'>

<a href='http://helplogger.blogspot.com'><img alt='Blogger
Tricks'
src='https://blogger.googleusercontent.com/img/b/R29vZ2xl/AVvXsEhgJaNgGXiE2fRakkiuqHIpbMDX_WUFqQeUpfb7GZKjrTakroInsGCb4Ys8-6h08gSMQP0JoC-KU7EDNdhZIiWb8ndC3hFd-T1pPWxWCxm-RbXy0d8AEKVwj0PUkFHyJ7Tr-NqhSAS3OpWS/s1600/best+blogger+tips.png'/></a>

</b:if></b:if>

<!-- Related Posts with Thumbnails Code End-->


Note:

- change the 6 value from max-results=with the number of posts you want to be displayed.

- If you want the related posts to be displayed on homepage too, remove the code in violet.


Catatan:
- Ubah nilai
6 dari  max-results=6 dengan jumlah posting yang ingin ditampilkan.
- Jika Anda ingin
related post  ini ditampilkan pada homepage juga, hapus kode warna  violet/ungu.


Langkah 7. Simpan Template


Enjoy :)


Credit goes to: bloggerpluggins.org . Modified by kivandanu


Facebook ID Lookup Finder Search Tool


Facebook logo Español: Logotipo de Facebook Fr...


Facebook ID Lookup Finder Search Tool


Identify your Facebook User ID or Page ID.


Enter Your Facebook Username or URL

(i.e. JohnDoe or http://www.facebook.com/JohnDoe)


Kamis

CSS Box Shadow - Membuat Efek Bayangan pada Area


CSS Box-Shadow

Berikut ini adalah kode CSS dasar untuk membuat efek bayangan pada objek:


CSS Bayangan Outset


div {
-webkit-box-shadow:10px 10px 7px #222; /* Safari & Chrome */
-moz-box-shadow:10px 10px 7px #222; /* Firefox */
box-shadow:10px 10px 7px #222; /* W3C */
}


CSS Bayangan Inset


div {
-webkit-box-shadow:inset 10px 10px 7px #222; /* Safari & Chrome */
-moz-box-shadow:inset 10px 10px 7px #222; /* Firefox */
box-shadow:inset 10px 10px 7px #222; /* W3C */
}

10px yang pertama adalah ukuran offset sumbu X, 10px yang ke dua adalah offset sumbu Y, 7px adalah tingkat blur, #222 adalah warna bayangan. Kamu juga bisa menuliskan nilai offset negatif untuk membuat bayangan menuju ke arah sebaliknya. Cara penerapannya bisa diletakkan secara top down ataupun inline seperti ini:


Top-DownInline
<style>

#kotak-1 {

  -webkit-box-shadow:10px 10px 7px #222;

  -moz-box-shadow:10px 10px 7px #222;

  box-shadow:10px 10px 7px #222;

}

</style>

<div id='kotak-1'>OBJEK</div>
<div style='-webkit-box-shadow:10px 10px 7px #222;-moz-box-shadow:10px 10px 7px #222;box-shadow:10px 10px 7px #222;'>OBJEK</div>


Dan ini adalah contoh-contoh penerapan yang lebih
detail. Saya sudah memberikan warna merah dan hijau untuk mempertegas
bagian mana yang harus menjadi perhatian:


-webkit-box-shadow: 10px 5px 7px #222;

-moz-box-shadow: 10px 5px 7px #222;

box-shadow: 10px 5px 7px #222;


-webkit-box-shadow: 0 10px 7px #222;

-moz-box-shadow: 0 10px 7px #222;

box-shadow: 0 10px 7px #222;


-webkit-box-shadow: 10px 0 7px #222;

-moz-box-shadow: 10px 0 7px #222;

box-shadow: 10px 0 7px #222;


-webkit-box-shadow: 0 0 7px #222;
-moz-box-shadow: 0 0 7px #222;


box-shadow: 0 0 7px #222;


-webkit-box-shadow: 0 0 20px #222;

-moz-box-shadow: 0 0 20px #222;

box-shadow: 0 0 20px #222;


-webkit-box-shadow: 0 0 20px #f10c0c;

-moz-box-shadow: 0 0 20px #f10c0c;

box-shadow: 0 0 20px #f10c0c;


-webkit-box-shadow: 10px 5px 0 #222;

-moz-box-shadow: 10px 5px 0 #222;

box-shadow: 10px 5px 0 #222;


-webkit-box-shadow: -10px -5px 0 #222;

-moz-box-shadow: -10px -5px 0 #222;

box-shadow: -10px -5px 0 #222;


-webkit-box-shadow: inset 10px 5px 7px #222;

-moz-box-shadow: inset 10px 5px 7px #222;

box-shadow: inset 10px 5px 7px #222;


-webkit-box-shadow: inset 0 10px 7px #222;

-moz-box-shadow: inset 0 10px 7px #222;

box-shadow: inset 0 10px 7px #222;


-webkit-box-shadow: inset 10px 0 7px #222;

-moz-box-shadow: inset 10px 0 7px #222;

box-shadow: inset 10px 0 7px #222;


-webkit-box-shadow: inset 0 0 7px #222;

-moz-box-shadow: inset 0 0 7px #222;

box-shadow: inset 0 0 7px #222;


-webkit-box-shadow: inset 0 0 20px #222;

-moz-box-shadow: inset 0 0 20px #222;

box-shadow: inset 0 0 20px #222;


-webkit-box-shadow: inset 0 0 20px #f10c0c;

-moz-box-shadow: inset 0 0 20px #f10c0c;

box-shadow: inset 0 0 20px #f10c0c;


-webkit-box-shadow: inset 10px 5px 0 #222;

-moz-box-shadow: inset 10px 5px 0 #222;

box-shadow: inset 10px 5px 0 #222;


-webkit-box-shadow: inset -10px -5px 0 #222;

-moz-box-shadow: inset -10px -5px 0 #222;

box-shadow: inset -10px -5px 0 #222;


Menjaga Keadaan Hover pada Menu Induk


Masalah yang tampak kecil tapi kita harap bisa diperbaiki adalah
mengenai efek hover menu induk pada navigasi bertingkat yang akan
menghilang setelah pointer memasuki submenu:


Menu Navigasi Sebelum Diperbaiki
Efek hover pada menu induk menghilang saat pointer memasuki submenu


Sebelum


Itu terjadi karena pada umumnya kita menargetkan efek hover pada elemen tautan saja seperti ini:


nav li a:hover {
background-color:blue;
}


Padahal yang seharusnya kita targetkan adalah elemen list/daftar yang menjadi induk dari submenu, karena submenu berada di dalam elemen <li>, bukan di dalam elemen <a>:


List Item
Susunan Submenu


Sayangnya menargetkan elemen <li> secara sepihak untuk mempertahankan warna menu induk tidak bisa kita lakukan karena efek hover berada pada elemen <a>, sehingga saat pointer keluar dari <a> maka efek hover akan menghilang. Tapi berbeda jika kita menargetkan elemen <li> kemudian memanfaatkan sikap hover pada elemen tersebut untuk mengeset warna direct children tautan di dalamnya:


nav li a:hover,
nav li:hover > a {
background-color:blue;
}


Dengan cara di atas maka warna pada menu induk akan tetap terjaga
meskipun pointer sudah meninggalkannya. Karena meskipun sudah keluar,
tapi pada dasarnya pointer masih berada di dalam elemen <li> induk:


Menu Navigasi Sesudah Diperbaiki
Warna hover pada menu induk tetap terjaga


Sesudah


ajb@2013

Virtual Comment Editor


PELET TIUPAN

Bismillaahirrohmanirrohiim…
Assalamu’alaikum…
Ijinkan saya kembali membabarkan ilmu pelet/mahabbah instan..
INNA ANNA AMANNA
TATA CARA :
-Baca 30x senafas sambil menatap target
-setelah selesai baca 30x Hirup sekuatnya melalui mulut (seolah-olah
kita menelan sukma target)
tahan nafas baca lafal 3x kemudian hembuskan/tiupkan lewat mulut
kembali pelan-pelan sampai nafas habis kearah target.
-target tidak boleh terhalang oleh apapun.
(misalkan sewaktu sdr. melafalkan bacaan tiba-tiba ada orang
lewat/target pindah tempat sehingga pandangan kita terhalang, maka
harus diulang dari awal lagi)
PESAN SAYA :
Mohon amalan ini dipergunakan seperlunya saja & JANGAN DIGUNAKAN UNTUK
MENDHOLIMI ORANG LAIN!
Mohon maaf apabila ada yang kurang berkenan dengan ilmu ini.
Wassalam…
Sumber: kwa 
MOHAMMAD NURUL HIDAYAT
nunkyuni@gmail.com

Demokrasi Pancasila Berdasarkan Agama dan Relevansinya terhadap Perilaku Sosial

  Demokrasi Pancasila Berdasarkan Agama dan Relevansinya terhadap Perilaku Sosial   BAB I PENDAHULUAN   Demokrasi Pancasila bukan...